Now that finals are complete I once again have time to work on projects. Video glasses for James, rebuilding super-DRSSTC among others, but the most important one right now, is Segue!
For the past year or so I’ve been working on and off on Segue; the world’s first DIY, brushless motor segway-robot-thing. My end goal is to design a Segue kit of sorts, to offer to all the ambitious nerds who would like to have their own DIY, aluminum-frame self-balancing transporter (for in theory, $1700).
This is how that’s thus far happened.
Around Christmas 2013:
Someone stole my bike on a cold friday night. This did not sit well with me, so I did the only logical thing I could do at the time: I built a segway.
Fortunately I was able to find on campus;
- An old power scooter
- A gyroscope
- An accelerometer
- An arduino
- A piece of plywood
- An aluminum tube
- A machine shop with a broken door lock
Monday morning, I had this:
Oddly enough, my evil plans worked. This doomsday device worked well enough to ride around campus for several weeks, and it probably sealed my reputation as a nerd at this university. Awesome!
But, “Segue” had several shortcomings:
- The motors were too slow to travel at speeds greater than 4mph, which made me sad.
- The motors’ gearboxes chattered… a lot. Often, this led to some interesting, positive gain oscillations!
- Lead acid batteries + winter = bad batteries in a week.
…among other things.
So I set out to build a new Segue, one that wouldn’t suck too much to commute around campus with. It was to have;
- Brushless motors
- Lithium batteries
- A metal frame with a “bad-ass” factor > 1.0
- Really, really good system control.
This turned out to be harder than first expected.
Segue 2: The Beginnings
First, I needed motors. Specifically brushless hub motors with a single, thick stator shaft. Where oh where, can one expect to find such a thing?
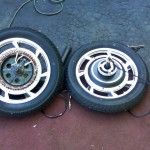
As one would expect, only in china. One month of negotiations and a $500 paypal transfer later, DHL showed up with my new toys!
Soon thereafter the next question was “what should Segue 2 look like?”, followed soon by, “how would I be able to manufacture more, if others want one?”. The answer to both of these questions, was immediately obvious:
–> Water jet cut industrial aluminum (⌐■_■)
A week of yelling at autodesk inventor, and about $300 at Klein steel and Nifty-Bar inc provided me with something worthwhile.
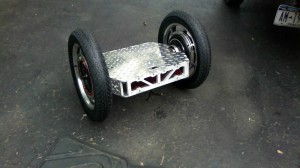 This, specifically! A sturdy, waterjet-cut frame held together with interleaving aluminum tongues, and friction through an interesting bolt-nut arrangement. Though that might sound worrying, this proved to be quite strong indeed!
The idea behind this frame, is to require nothing but a wrench and a screwdriver to assemble it. This is so because tig welding for assembly of a kit isn’t quite my idea of a weekend project, nor do I expect it to be anyone else’s.
Now, it was electronics time. It’s fair to argue that it’s still electronics time, but let’s not go there just yet. The question to ask again, was “what does a Segue need?”, soon followed by “how can I do that, without spending $2,000 on mouser?”
A Segue has batteries; batteries need a battery management system. A Segue needs a computer, it needs an inertial sensor and it needs power supplies for such. A Segue needs two motor controllers, and three FET half-bridges on each of those. We found that a Segue needs at minimum, $100 worth of electronic components –which isn’t too bad.
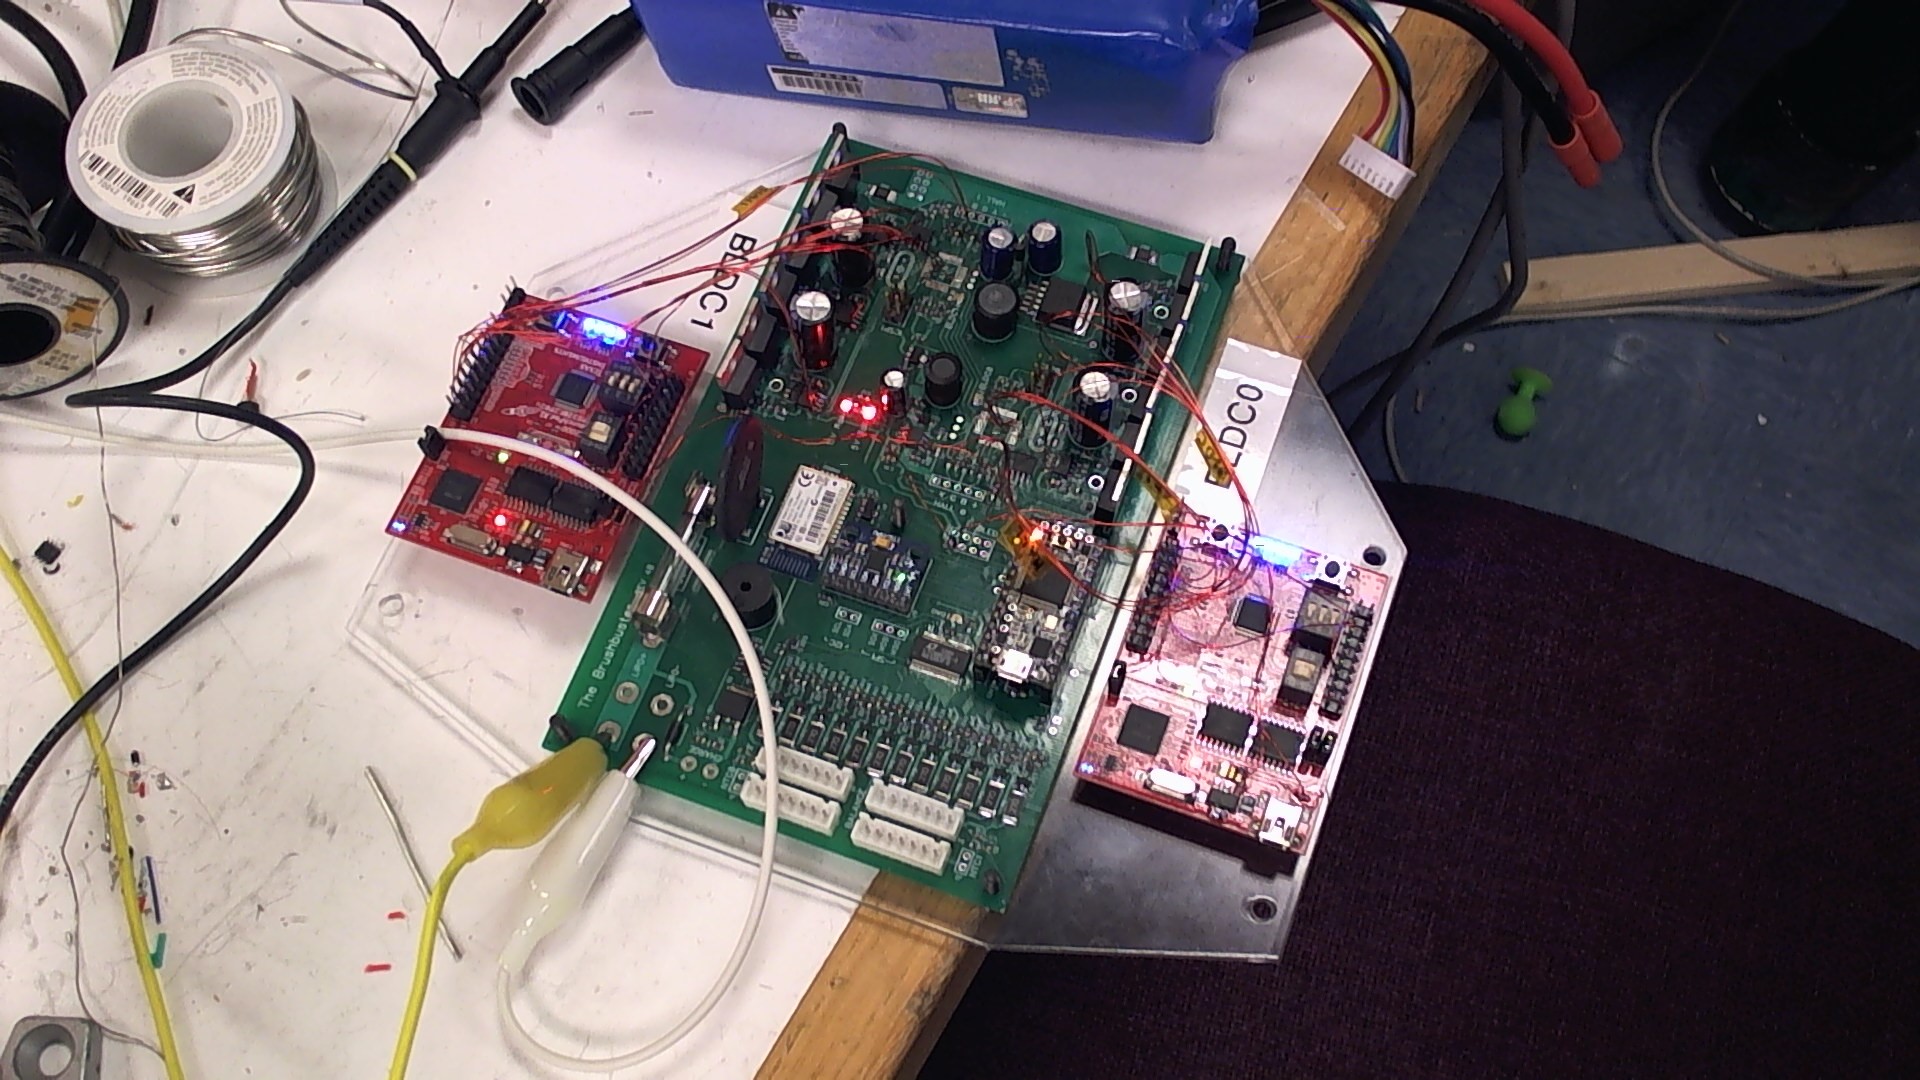
I won’t go into much detail on the early prototypes. It should be rather obvious, what I’ve done there from this next photo, so here it is:
I will point out though, the following decisions:
- The main computer is a Teensy 3.0, which itself is a cortex-M4 running Arduino. I chose to use this because I want Segue 2 to be easily hackable: c purists, go home.
- I chose to use a finite-state machine as my motor controller. This was a bad decision. I probably should have foreseen so, but alas, I assumed it might work anyway. Nope.
That is not how we Segue around these parts.
The re-Segueing:
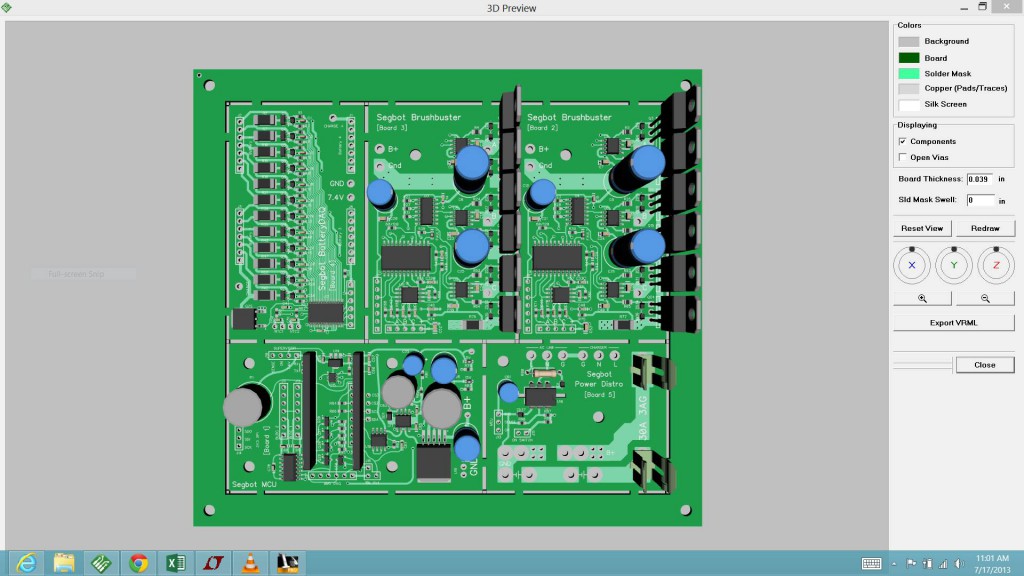
Board two combined everything into PCB. The state machines were dropped in favor of a nice BLDC motor controller IC, bugs in the battery management system and SPI bus were fixed, the power supplies were made a bit more reliable and layout was generally improved. The mosfets no longer suffered from random explosions.
I seem to have lost the photos I had of this board, but once again, we had motor control issues. Namely I learned from this design, that commercial motor control ICs suck something fierce!
I learned also, the importance of proper inrush current limiting!
The re-re-Segueing:
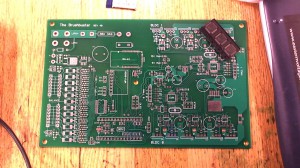
Board three dumped the motor control IC in favor of an AVR32. Inrush current limiting was added, along with a proper fuse, and a bluetooth radio, once I realized I could use a smart watch to steer the Segue!
This is the board where I learned that AVR32 is a mess beyond comprehension, where somehow Atmel took the harvard architecture and broke it.
There are 9 ways to multiply two numbers in that instruction set. THIS IS NOT USEFUL. (╯°□°)╯︵ ┻━┻
AVR32 was soon abandoned in favor of TI’s C2000 Piccolo series DSP’s. They are in fact real RISC machines; and I can understand their command set which is just lovely when I’m trying to use them.
Final exams haven’t given me time to play with these just yet, unfortunately…
The current state of Segue (2013):
The main goals of the project as of now are to design a reliable, self-balancing segue-bot with:
- A frame supporting two 2kW brushless hub motors, both providing in theory, a top speed of 25mph.
- A 500Wh lithium ion battery pack, with associated charging, and battery management systems.
- A bayesian inertial measurement engine, to provide accurate ground normal, velocity and acceleration measurements for the rest of the system.
- On board, electronically switched power converters, to provide for things a 5V, 15V and 3V rail from the 51V battery stack.
- Bluetooth connectivity, for hands-free steering with a smart-watch.
- Suitable power electronics, for heat-free switching of the brushless motors’ stators.
- A dead-reckoning, bayesian-corrected motor simulation engine, to allow for “0 speed”, constant torque brushless motor driving. Gimballing, if you will.
Of these goals five have thus been accomplished. The frame is built, the battery management system is done and does not explode, the power converters are working reliably from the 51V they’re given, the bluetooth works, and the MOSFET buffers work and don’t require heatsinking. That took the whole of last summer!
What’s left to do at this point is nothing but math.
Brushless motors are tricky devils. In order to spin one’s rotor, you must provide with its three stator coils, a rotating magnetic field. That in itself isn’t too hard:
Stator n = A cos(0 – ωt + Φ)
Where each Φ is offset either 60 or 120 degrees from the last coil’s, depending on the design of your motor. Advancing t would spin the motor in one direction, regressing t moves it the other direction. ω is simply your angular frequency of electrical rotation, which itself is related to the motor’s physical rotation by some constant.
Simple, right? Well… not quite. Physics likes to screw things up.
A is the maximum amplitude of your wave function; the case of DSP control, this would be the maximum PWM duty cycle of your mosfets, and thus the maximum current given to the stator winding in question. There, lies one problem: voltage and current aren’t necessarily aligned in the motor. Why?
Think about a loop of wire moving in a non-uniform B field.n As flux lines cut this loop, an emf will be generated in it as per the maxwell-faraday equation:

Notice something though; in no way, does current play a role in this guy! That is to say, the emf generated in the loop of wire, moving in a B field, is *independent* of the current in the wire.
Of course if we want to push back on the B field as we do with a motor; one needs a current in the loop. This is so, because of the Lorentz relationship:

Where (charge * velocity) = (Coulombs / Second) = current. Note here, that voltage plays no role! Ruh roh.
As non-intuitive as it may seem, a voltage generated, and a current generating a force, in a wire with no resistance, are two entirely different phenomena. Ain’t that something?
But here’s the kicker: see that little (-) sign in front of d phi / dt in the maxwell-faraday equation? That’s the little bit of hell right there which makes this job hard. It’s of opposite sign, of the voltage we need to apply to our real, restive wire, to make current flow in the direction we need. Clarifying:
Spinning the motor generates a voltage of opposite sign as the one you are applying to spin it. This is velocity dependent.
So that means A in our equation, is also a function of ω. Not only that, but it is a function also of the motor’s stator resistance and B field strength, where these themselves are even functions of temperature! Delightful.
There is no general solution to A, as it will be different for every motor. But, it is typically an empirically derived function of ω, which will do its best to scale I such that we can properly offset the back emf of the motor, such that the system becomes linear.
Got that? Good. There are more wrenches to toss in!
Magnets are not of infinite strength, and motors are not perfect. Thus, it’s possible to force them in positions no one likes; positions where the magnets we’re trying to move are no longer aligned with the field of our stator. It’s possible to lose track of them, for all intents and purposes.
To avoid this, ω needs to be correctly adjusted, such that if the motor is decidedly slowing down and we’re unable to do anything about it, that electrical RPM’s stay synced with the mechanical ones [w_m]. If they don’t, then the game’s over.
So now, we need to make ω a function of ω_m. Ok, but what is ω_m?
Therein lies big problem #2. I don’t know.
Mechanical RPM is difficult to measure at low speed. This is so, because nearly every velocity sensor in existence, relies solely on either:
- Discrete reference marks passing by some point, (hall effect sensors, rotary encoders, etc)
- Non-discrete references, such as the voltage generated in a wire, as a magnet rotates over it.
As one would have it, both fall apart at low speed. Discrete references don’t pass by fast enough to properly infer some (delta reference) / (delta t) value, and non-discrete measurements such as the one described, become signals too small to measure. s a bonus, how the hell am I to define what ω_m is at zero speed?
In reality we need a rotor position measurement, and a really precise one to boot. That’s expensive!
Expensive doesn’t work on a DIY segue-bot kit. It’s the same reason why I’m not just using a small motor and a planetary gearbox to begin with.
The Plan From here:
I have hall effect sensors; 6 of them. I have a motor whose flux linkage, stator resistance, and rotor field strength I can measure, and whose stator currents I have PWM control of, and can measure with kelvin sensing. I have Maxwell’s equations, Wikipedia articles describing Bayesian statistics, and 6 weeks of winter break to figure all that math out.
Let’s do this:
With a known flux linkage, moment of inertia, B field strength and stator resistance, I can run a simulation of my motor inside the DSP. From this, I can know its momentum, and guess how it should respond to a given current. Based on its current angular velocity, I can then scale this current value to compensate for phase lead / lag. Then, based on some a priori measurement, give the mosfets some (ideally correct) PWM values, and increase/decrease that duty cycle based on the phase’s current sense resistor.
The angular velocity will be found through 1), what I’m modeling the motor to do and 2), some correction, based on information to from the hall effect sensors. At zero speeds, I’ll just “gimbal” the motor and hope for the best. In theory, its application (balancing the robot) won’t torque the motor to such an extreme, that I will skip commutation steps.
So in essence, I need to cram:
- Hall effect sensor information
- Current information
- A priori knowledge
- A desired speed — Into —> [ Magic filter ] —> [ PWM value register ]
- A desired torque
- Maxwell’s Equations
- Ohm’s Law
All in some way that makes the DSP not catch fire.
Hoboy. ∎
Edit: The story continues…
Leave a Reply